Needlepoint Designs
by Catherine Fournier
Needlepoint is the techique of forming stitches on a special open-weave fabric known as canvas. Canvas can be made of silk, cotton, synthetic fabric or plastic. Each is suitable for a particular style of needlepoint. Canvas is constructed of lengthwise and crosswise threads that are woven together to produce precisely spaced holes betwen the threads. The poins at which these threads intersect are known as meshes. Canvas is sized by gauge, the number of meshes per inch (2.5 cm) of that canvas. A higher number means a smaller, tighter weave.
All needlepoint stitches are worked within the gridlike structure of the canvas. Basically, the yarn or any needlepoint stitch can go in only two directions, either diagonally across or parallel to the canvas threads and meshes. The direction the yarn takes is dictated by the kind of stitch being worked, and the style of the project. Several needlepoint stitches fall in only one direction; others require yarns to be laid in several directions or even require the yarns to be crossed over each other.
There are three basic styles of needlepoint: tent stitch, (a short, straight stitch which spans diagonally from one mesh to another), novelty stitches (which form different textures and can be used to give interest to a piece) and bargello or florentine stitches (a stylised pattern of stitches, sometimes of varying length which forms abstract shapes and stripes.)
Stitch size is determined by the gauge of the canvas and the stitch style being used. It will affect the amount of working time, and the durability of the finished item.
Almost any yarn can be used for needlepoint, the type and gauge of canvas, the style of stitch and the eventual use of the project will determine the best yarn for the job. Wool is usually used, though cotton embroidery floss and metallic yarns can be used to good effect. The yarn should be fine enough to slide through the homes of the canvas easily and without distortion, but thick enough to cover the canvas when stitched. A tapestry needle with a large eye and blunt point for sliding between the meshes is needed.
The following basic stitch instructions are from: Classic Stitches Stitch Glossary
 |
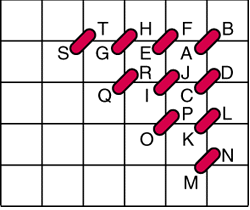
BASKETWEAVE TENT STITCH Work as for tent stitch beginning in the top right-hand corner of the area to be filled, stitching in diagonal rows as shown in the diagram. A basketweave pattern will appear on the back of your canvas giving a padded and durable effect. |
 |
CROSS STITCH Bring the thread through at the lower right-hand side, insert the needle 1 block up and 1 block to the left and bring out 1 block down, thus forming a half cross, continue in this way to the end of the row. Complete the upper half of the cross as shown. Cross stitch may be worked either from right to left or left to right, but it is important that the upper half of all crosses should lie in the same direction. |
 |
TENT (PETIT POINT) STITCH The rows are worked from right to left and vice versa. Fig. 1 - bring the thread out at the right-hand side, work a stitch diagonally upwards over 1 canvas thread intersection, pass the needle diagonally downwards behind 1 horizontal and 2 vertical canvas threads and bring through in readiness for next stitch. Fig. 2 - the second row is worked from left to right, the direction of the stitches is the same as the previous row but the needle is passed diagonally upwards. All stitches should slope in the same direction. The stitches on the reverse side are longer and slope more than on the correct side. |
 |
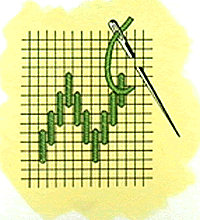
FLORENTINE STITCH This stitch is used for working zig-zag patterns known as Florentine work. It is generally used to fill a large area and is then worked in rows of different colours forming an all-over wave pattern. The diagram shows the method of working a single row of stitches. It will be necessary to work part stitches at the diagonal and outer edges. |
 |
FRENCH KNOTS Bring the thread out at the required position, hold the thread down with the left thumb and encircle the thread twice with the needle as at A. Still holding the thread firmly, twist the needle back to the starting point and insert it close to where the thread first emerged (see arrow). Pull thread through to the back and secure for a single french knot or pass on to the position of the next stitch as at B. |
For more information and detailed instructions, there are several sites on the net with basic needlepoint instruction. These include the One-Hour Needlepoint Course and the Needlepoint Group's On-line Needlepoint Course.
Almost anything can be made from needlepoint. Rugs, cusions, seat covers, placemats, cases, ornaments, Christmas stokings, pictures and wallhangings, the list is endless and limited only by your imagination. Any one can do needlepoint too, from young children to adults.
A great site for needlepoint is the Mining Company Needlepoint site, mananged by Janet Perry. It offers craft ideas and free designs, answers questions about needlepoint and lots of links to other needlepoint related sites.
Some free for your personal use designs can be found at the Christmas site. They are all 'Christmas' theme - it's never too early to start, and it will be too late before you know it!
Return to Fridge Art Page.